OK, ready to start casting parts? Start off by making a foam model and then dipping it in drywall texture so a thin shell is formed around the part.
I use Hamiltons White Line Drywall Texture mix from the depot stores. It comes in a 50lb bag and you mix it with water to form the thinnest possible consistency.

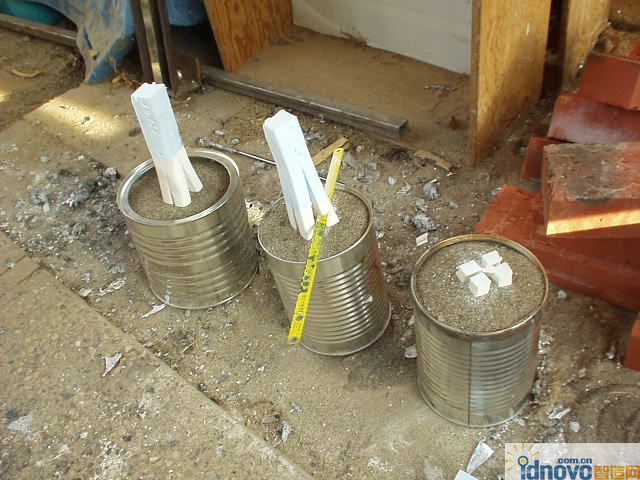
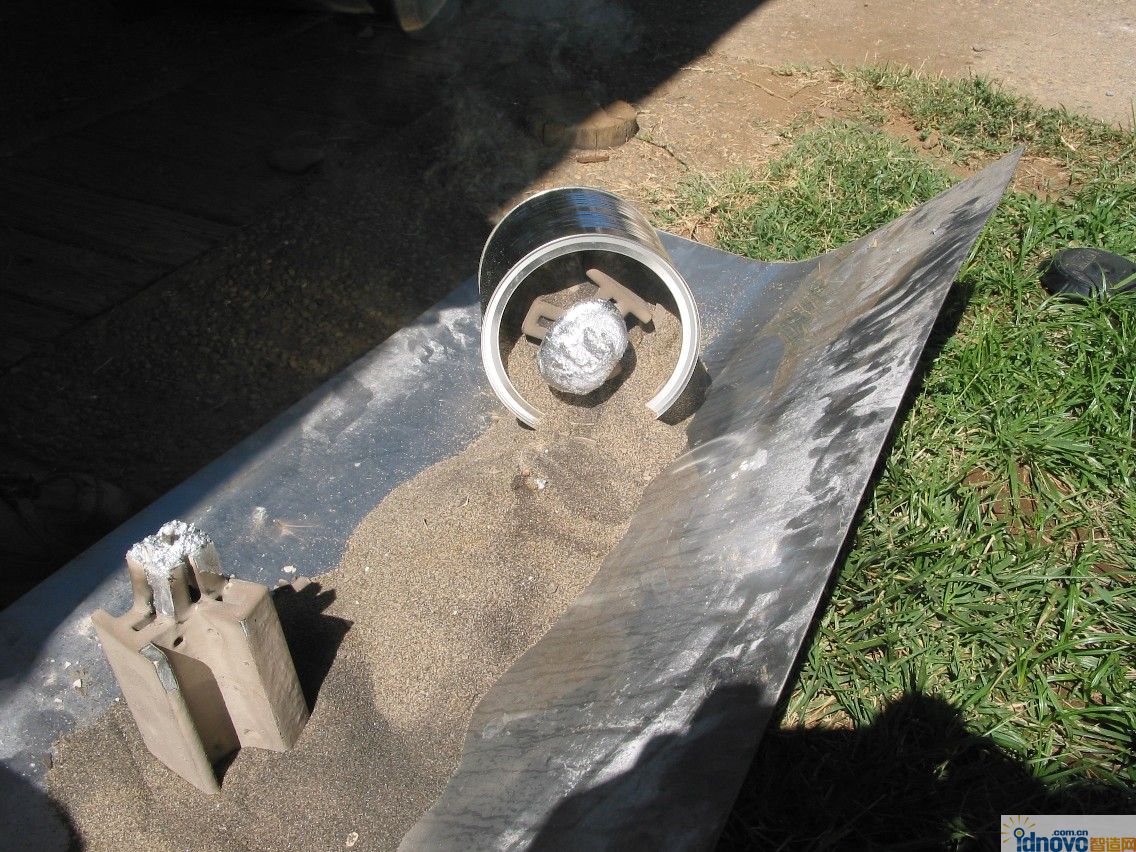
When the plaster shell is dry, place the model in a can and fill with sand. Then cut the sprue down to size with a fine tooth hack saw blade.
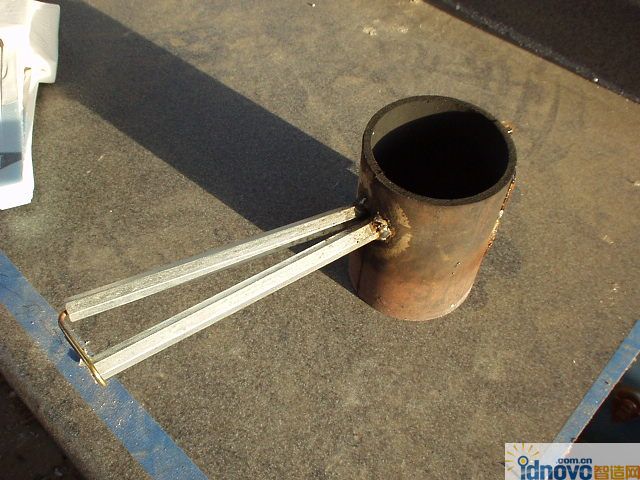
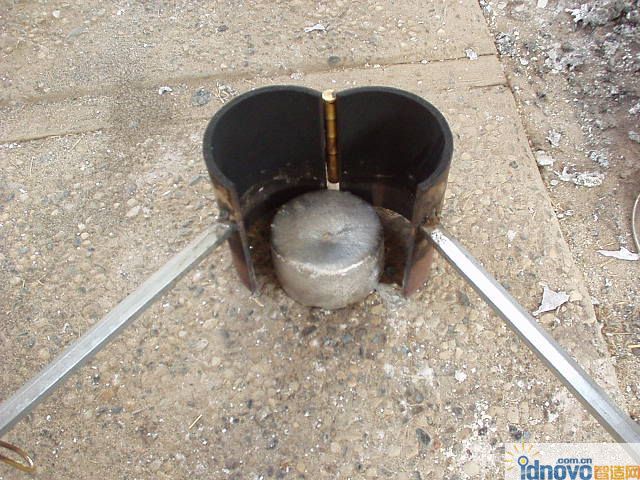
If you are going to be doing a lot of casting, you have to make yourself a KHPT (Kush Head Pressure Tool). Just cut a piece of 4 inch pipe lengthwise and weld a hinge and some handles to it so you can open it like a clamshell and keep it closed when it needs to be closed. In my opinion, this is the most important tool you can have. It saves tons of time and wasted castings by increasing the head pressure of the molten metal as it flows into the mold cavity.
See how nice it works. Put some kind of clip on the handles to keep it closed.

Next, I premelt the tips of the sprue so the aluminum has a place to start into the foam. This works great with the KHPT because now the pressure has a place to force the molten metal into.

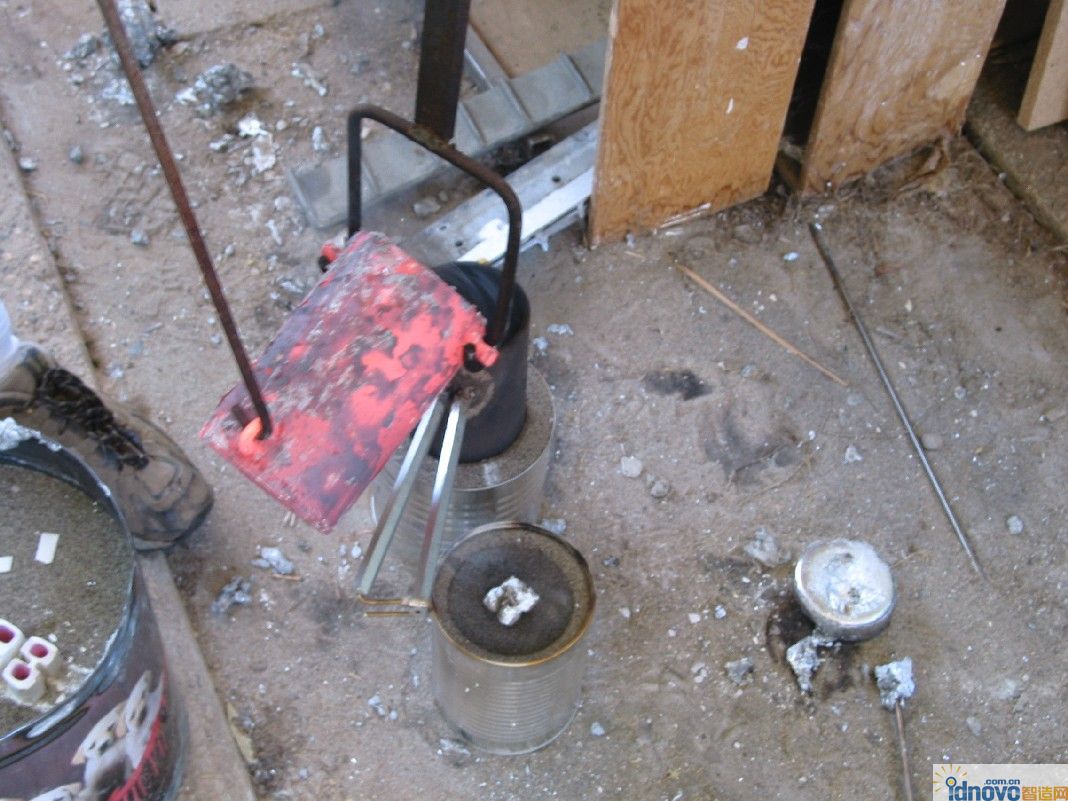
Now drop the KHPT over the sprue and get ready to pour.

Once your aluminum is nice and orange, pour the beautiful fluid into the KHPT making sure you over fill it by about 3 inches. This will give the mold the head pressure it needs to completely fill the cavity.
Another angle showing the pour.

My favorite picture ever!

Now let the aluminum cool a bit and right before it completely crystalizes, remove the KHPT from the flask.

The button can then be easily ejected and placed back into the crucible for remelt.
After 5-10 minutes of cooling, dump the sand from the flask and grab the part with your pliers.

Take the part to the cooling bucket and give it a dunk. Most of the plaster falls off, but you might have to remove some of the muddy plaster from the detail areas.
Now repeat the process until you have one or two or a bunch of the parts that you need.
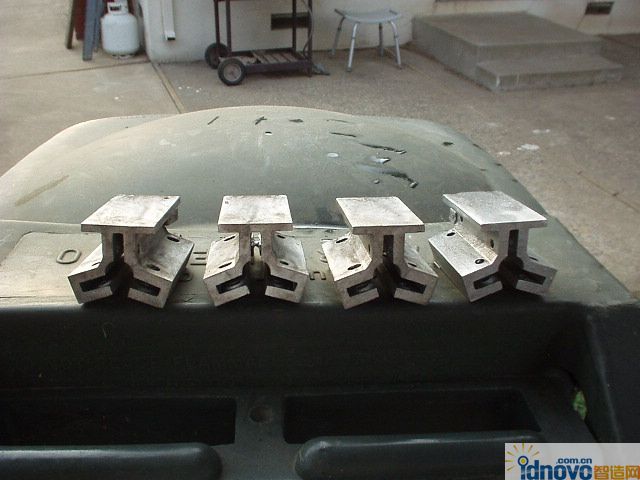

Before you know it, you will have a mountain of cool home-cast parts that are ready for finish machining.

相关文章
- 2021-09-08BIM技术丛书Revit软件应用系列Autodesk Revit族详解 [
- 2021-09-08全国专业技术人员计算机应用能力考试用书 AutoCAD2004
- 2021-09-08EXCEL在工作中的应用 制表、数据处理及宏应用PDF下载
- 2021-08-30从零开始AutoCAD 2014中文版机械制图基础培训教程 [李
- 2021-08-30从零开始AutoCAD 2014中文版建筑制图基础培训教程 [朱
- 2021-08-30电气CAD实例教程AutoCAD 2010中文版 [左昉 等编著] 20
- 2021-08-30电影风暴2:Maya影像实拍与三维合成攻略PDF下载
- 2021-08-30高等院校艺术设计案例教程中文版AutoCAD 建筑设计案例
- 2021-08-29环境艺术制图AutoCAD [徐幼光 编著] 2013年PDF下载
- 2021-08-29机械AutoCAD 项目教程 第3版 [缪希伟 主编] 2012年PDF